添加单元测试依赖
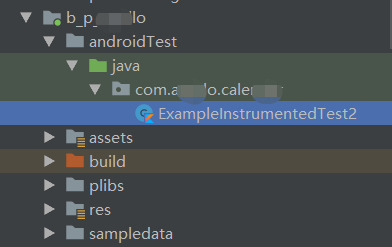
由于项目工程是从eclipse迁移过来的,并没有 androidTest 这个目录。因此无法进行 instrumented unit tests。
目前项目还没有转到 androidx ,所以还是使用 com.android.support.test 版本的依赖。
为了支持 instrumented unit tests 需要在项目module的 build.gradle 添加相应的依赖:
dependencies {
    implementation fileTree(dir: 'libs', include: ['*.jar'])
    implementation "org.jetbrains.kotlin:kotlin-stdlib-jdk7:$kotlin_version"
    implementation 'com.android.support:appcompat-v7:27.1.1'
    implementation 'com.android.support.constraint:constraint-layout:1.1.3'

    //添加以下单元测试需要的依赖
    testImplementation 'junit:junit:4.12'
    androidTestImplementation 'com.android.support.test:runner:1.0.2'
    androidTestImplementation 'com.android.support.test.espresso:espresso-core:3.0.2'
}
设置测试工具运行器
为了使用 JUnit 4 测试类,需要将 AndroidJUnitRunner 指定为项目中的默认测试工具运行器。
在项目module的 build.gradle 添加以下配置:
android {
    defaultConfig {
        testInstrumentationRunner "androidx.test.runner.AndroidJUnitRunner"
    }
}
指定 androidTest 代码目录
在项目module的 build.gradle 添加 androidTest 配置:
sourceSets {
    main {
        ...
    }
    //这里添加androidTest配置
    androidTest{
        java.srcDirs = ['androidTest/java']
    }

    test {
        java.srcDirs = ['test/java']
    }
}
然后在项目module的根目录创建 androidTest/ java 目录。
在 androidTest/ java 目录下创建包,然后创建测试代码。

ExampleInstrumentedTest2 测试代码如下:
import android.support.test.InstrumentationRegistry
import android.support.test.runner.AndroidJUnit4
import org.junit.Assert.assertEquals
import org.junit.Test
import org.junit.runner.RunWith

/**
 * Instrumented test, which will execute on an Android device.
 *
 * See [testing documentation](http://d.android.com/tools/testing).
 */
@RunWith(AndroidJUnit4::class)
class ExampleInstrumentedTest2 {

    @Test
    fun useAppContext() {
        // Context of the app under test.
        val appContext = InstrumentationRegistry.getInstrumentation().targetContext
        assertEquals("com.congwiny.test", appContext.packageName)
    }
}
配置测试矩阵并运行测试
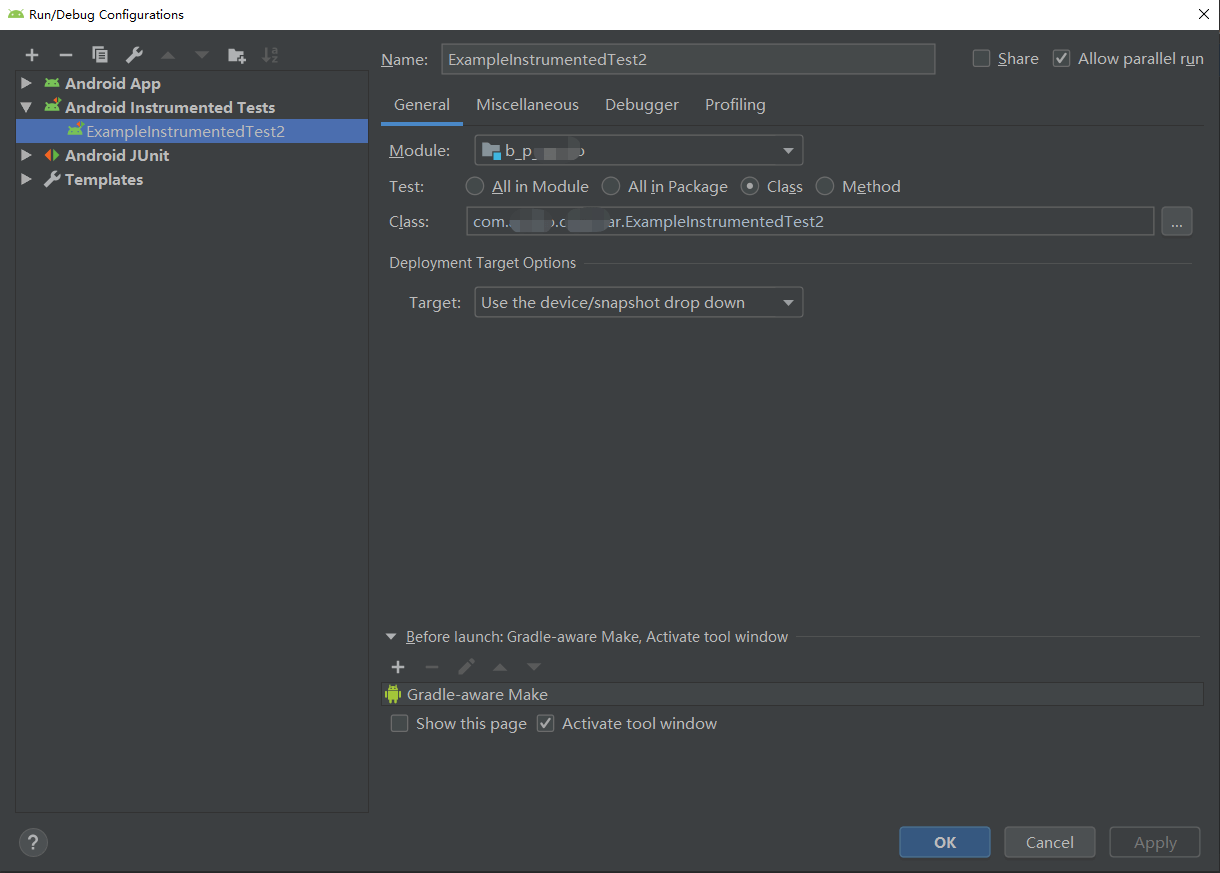
- 从主菜单中单击 Run > Edit Configurations 配置
- 点击 Add New Configuration 并选择 Android Instrumented Tests
- 在 Android Instrumented Tests 对话框中配置如下,配置完成之后然后点击
Ok按钮退出对话框
- 点击 Run 运行测试


